Part 2: Rewrite Hello for nf-core
In this second part of the Hello nf-core training course, we show you how to create an nf-core compatible version of the pipeline produced by the Hello Nextflow beginners' course.
You'll have noticed in the first section of the training that nf-core pipelines follow a fairly elaborate structure with a lot of accessory files. Creating all that from scratch would be very tedious, so the nf-core community has developed tooling to do it from a template instead, to bootstrap the process.
We are going to show you how to use this tooling to create a pipeline scaffold, then adapt existing 'regular' pipeline code onto the nf-core scaffold.
Note
The nf-core-tools package is pre-installed for you in our training environment.
If you are using a different environment, you need to check whether the package is installed (run nf-core --help in your terminal) and if not, install it as described here: https://nf-co.re/docs/nf-core-tools/installation.
1. Create a new pipeline project
First, we create the scaffold for the new pipeline.
Note
Make sure you are in the hello-nf-core directory in your terminal.
1.1. Run the template-based pipeline creation tool
Let's start by creating a new pipeline with the nf-core pipelines create command.
This will create a new pipeline scaffold using the nf-core base template, customized with a pipeline name, description, and author.
Running this command will open a Text User Interface (TUI) for pipeline creation:
This TUI will ask you to provide basic information about your pipeline and will provide you with a choice of features to include or exclude in your pipeline scaffold.
- On the welcome screen, click Let's go!.
- On the
Choose pipeline typescreen, click Custom. - Enter your pipeline details as follows (replacing
< YOUR NAME >with your own name), then click Next.
[ ] GitHub organisation: core
[ ] Workflow name: hello
[ ] A short description of your pipeline: A basic nf-core style version of Hello Nextflow
[ ] Name of the main author(s): < YOUR NAME >
- On the Template features screen, set
Toggle all featuresto off, then selectively enable the following. Check your selections and click Continue.
[ ] Add testing profiles
[ ] Use nf-core components
[ ] Use nf-schema
[ ] Add configuration files
[ ] Add documentation
- On the
Final detailsscreen, click Finish. Wait for the pipeline to be created, then click Continue. - On the Create GitHub repository screen, click Finish without creating a repo. This will display instructions for creating a GitHub repository later. Ignore these and click Close.
Once the TUI closes, you should see the following console output.
                                          ,--./,-.
          ___     __   __   __   ___     /,-._.--~\
    |\ | |__  __ /  ` /  \ |__) |__         }  {
    | \| |       \__, \__/ |  \ |___     \`-._,-`-,
                                          `._,._,'

    nf-core/tools version 3.4.1 - https://nf-co.re


INFO     Launching interactive nf-core pipeline creation tool.
There is no explicit confirmation in the console output that the pipeline creation worked, but you should see a new directory called core-hello.
View the contents of the new directory to see how much work you saved yourself by using the template.
Directory contents
core-hello/
├── assets
│   ├── samplesheet.csv
│   └── schema_input.json
├── conf
│   ├── base.config
│   ├── modules.config
│   ├── test.config
│   └── test_full.config
├── docs
│   ├── output.md
│   ├── README.md
│   └── usage.md
├── main.nf
├── modules.json
├── nextflow.config
├── nextflow_schema.json
├── README.md
├── subworkflows
│   ├── local
│   │   └── utils_nfcore_hello_pipeline
│   │       └── main.nf
│   └── nf-core
│       ├── utils_nextflow_pipeline
│       │   ├── main.nf
│       │   ├── meta.yml
│       │   └── tests
│       │       ├── main.function.nf.test
│       │       ├── main.function.nf.test.snap
│       │       ├── main.workflow.nf.test
│       │       └── nextflow.config
│       ├── utils_nfcore_pipeline
│       │   ├── main.nf
│       │   ├── meta.yml
│       │   └── tests
│       │       ├── main.function.nf.test
│       │       ├── main.function.nf.test.snap
│       │       ├── main.workflow.nf.test
│       │       ├── main.workflow.nf.test.snap
│       │       └── nextflow.config
│       └── utils_nfschema_plugin
│           ├── main.nf
│           ├── meta.yml
│           └── tests
│               ├── main.nf.test
│               ├── nextflow.config
│               └── nextflow_schema.json
└── workflows
    └── hello.nf

14 directories, 34 files
That's a lot of files!
Hopefully you'll recognize a lot of them as the same we came across when we explored the nf-core/demo pipeline structure.
But don't worry if you're still feeling a little lost; we'll walk through the important parts together in the course of this training.
Note
One important difference compared to the nf-core/demo pipeline we examined in the first part of this training is that there is no modules directory.
This is because we didn't elect to include any of the default nf-core modules.
1.2. Test that the scaffold is functional
Believe it or not, even though you haven't yet added any modules to make it do real work, the pipeline scaffold can actually be run using the test profile, the same way we ran the nf-core/demo pipeline.
Output
N E X T F L O W   ~  version 25.04.3

Launching `./core-hello/main.nf` [scruffy_marconi] DSL2 - revision: b9e9b3b8de

Downloading plugin nf-schema@2.5.1
Input/output options
  input                     : https://raw.githubusercontent.com/nf-core/test-datasets/viralrecon/samplesheet/samplesheet_test_illumina_amplicon.csv
  outdir                    : core-hello-results

Institutional config options
  config_profile_name       : Test profile
  config_profile_description: Minimal test dataset to check pipeline function

Generic options
  trace_report_suffix       : 2025-11-21_04-47-18

Core Nextflow options
  runName                   : scruffy_marconi
  containerEngine           : docker
  launchDir                 : /workspaces/training/hello-nf-core
  workDir                   : /workspaces/training/hello-nf-core/work
  projectDir                : /workspaces/training/hello-nf-core/core-hello
  userName                  : root
  profile                   : docker,test
  configFiles               : /workspaces/training/hello-nf-core/core-hello/nextflow.config

!! Only displaying parameters that differ from the pipeline defaults !!
------------------------------------------------------
-[core/hello] Pipeline completed successfully-
This shows you that all the basic wiring is in place. So where are the outputs? Are there any?
In fact, a new directory of results called core-hello-results was created containing the standard execution reports:
Directory contents
You can take a peek at the reports to see what was run, and the answer is: nothing at all!

Let's have a look at what is actually in the code.
1.3. Examine the placeholder workflow
If you look inside the main.nf file, you'll see it imports a workflow called HELLO from workflows/hello.
This is equivalent to the workflows/demo.nf workflow we encountered in Part 1, and serves as a placeholder workflow for our workflow of interest, with some nf-core functionality already in place.
Compared to a basic Nextflow workflow like the one developed in Hello Nextflow, you'll notice a few things that are new here (highlighted lines above):
- The workflow block has a name
- Workflow inputs are declared using the
take:keyword and the channel construction is moved up to the parent workflow - Workflow content is placed inside a
main:block - Outputs are declared using the
emit:keyword
These are optional features of Nextflow that make the workflow composable, meaning that it can be called from within another workflow.
Composable workflows in depth
The Workflows of Workflows Side Quest explores workflow composition in much greater depth, including how to compose multiple workflows together and manage complex data flows between them. We're introducing composability here because it's a fundamental requirement of the nf-core template architecture, which uses nested workflows to organize pipeline initialization, the main analysis workflow, and completion tasks into separate, reusable components.
We are going to need to plug the relevant logic from our workflow of interest into that structure. The first step for that is to make our original workflow composable.
Takeaway
You now know how to create a pipeline scaffold using nf-core tools.
What's next?
Learn how to make a simple workflow composable as a prelude to making it nf-core compatible.
2. Make the original Hello Nextflow workflow composable
Now it's time to get to work integrating our workflow into the nf-core scaffold. As a reminder, we're working with the workflow featured in our Hello Nextflow training course.
What does the Hello Nextflow workflow do?
If you haven't done the Hello Nextflow training, here's a quick overview of what this simple workflow does.
The workflow takes a CSV file containing greetings, runs four consecutive transformation steps on them, and outputs a single text file containing an ASCII picture of a fun character saying the greetings.
The four steps are implemented as Nextflow processes (sayHello, convertToUpper, collectGreetings, and cowpy) stored in separate module files.
sayHello: Writes each greeting to its own output file (e.g., "Hello-output.txt")convertToUpper: Converts each greeting to uppercase (e.g., "HELLO")collectGreetings: Collects all uppercase greetings into a single batch filecowpy: Generates ASCII art using thecowpytool
The results are published to a directory called results/, and the final output of the pipeline (when run with default parameters) is a plain text file containing ASCII art of a turkey saying the uppercased greetings.
 _________
/ BONJOUR \
| HELLO   |
\ HOLà    /
---------
  \                                  ,+*^^*+___+++_
  \                           ,*^^^^              )
    \                       _+*                     ^**+_
    \                    +^       _ _++*+_+++_,         )
              _+^^*+_    (     ,+*^ ^          \+_        )
            {       )  (    ,(    ,_+--+--,      ^)      ^\
            { (\@)    } f   ,(  ,+-^ __*_*_  ^^\_   ^\       )
          {:;-/    (_+*-+^^^^^+*+*<_ _++_)_    )    )      /
          ( /  (    (        ,___    ^*+_+* )   <    <      \
          U _/     )    *--<  ) ^\-----++__)   )    )       )
            (      )  _(^)^^))  )  )\^^^^^))^*+/    /       /
          (      /  (_))_^)) )  )  ))^^^^^))^^^)__/     +^^
        (     ,/    (^))^))  )  ) ))^^^^^^^))^^)       _)
          *+__+*       (_))^)  ) ) ))^^^^^^))^^^^^)____*^
          \             \_)^)_)) ))^^^^^^^^^^))^^^^)
          (_             ^\__^^^^^^^^^^^^))^^^^^^^)
            ^\___            ^\__^^^^^^))^^^^^^^^)\\
                  ^^^^^\uuu/^^\uuu/^^^^\^\^\^\^\^\^\^\
                    ___) >____) >___   ^\_\_\_\_\_\_\)
                    ^^^//\\_^^//\\_^       ^(\_\_\_\)
                      ^^^ ^^ ^^^ ^
We provide you with a clean, fully functional copy of the completed Hello Nextflow workflow in the directory original-hello along with its modules and the default CSV file it expects to use as input.
Directory contents
Feel free to run it to satisfy yourself that it works:
Output
Let's open the hello.nf workflow file to inspect the code, which is shown in full below (not counting the processes, which are in modules):
As you can see, this workflow was written as a simple unnamed workflow that can be run on its own. In order to make it runnable from within a parent workflow as the nf-core template requires, we need to make it composable.
Let's walk through the necessary changes one by one.
2.1. Name the workflow
First, let's give the workflow a name so we can refer to it from a parent workflow.
The same conventions apply to workflow names as to module names.
2.2. Replace channel construction with take
Now, replace the channel construction with a simple take statement declaring expected inputs.
This leaves the details of how the inputs are provided up to the parent workflow.
While we're at it, we can also comment out the line
params.greeting = 'greetings.csv'
Note
If you have the Nextflow language server extension installed, the syntax checker will light up your code with red squiggles.
That's because if you put in a take: statement, you have to also have a main:.
We'll add that in the next step.
2.3. Preface workflow operations with main statement
Next, add a main statement before the rest of the operations called in the body of the workflow.
This basically says 'this is what this workflow does'.
2.4. Add emit statement
Finally, add an emit statement declaring what are the final outputs of the workflow.
This is a net new addition to the code compared to the original workflow.
2.5. Recap of the completed changes
If you've done all the changes as described, your workflow should now look like this:
This describes everything Nextflow needs EXCEPT what to feed into the input channel. That is going to be defined in the parent workflow, also called the entrypoint workflow.
2.6. Make a dummy entrypoint workflow
Before integrating our composable workflow into the complex nf-core scaffold, let's verify it works correctly. We can make a simple dummy entrypoint workflow to test the composable workflow in isolation.
Create a blank file named main.nf in the sameoriginal-hello directory.
Copy the following code into the main.nf file.
There are two important observations to make here:
- The syntax for calling the imported workflow is essentially the same as the syntax for calling modules.
- Everything that is related to pulling the inputs into the workflow (input parameter and channel construction) is now declared in this parent workflow.
Note
Naming the entrypoint workflow file main.nf is a convention, not a requirement.
If you follow this convention, you can omit specifying the workflow file name in your nextflow run command.
Nextflow will automatically look for a file named main.nf in the execution directory.
However, you can name the entrypoint workflow file something else if you prefer.
In that case, be sure to specify the workflow file name in your nextflow run command.
2.7. Test that the workflow runs
We finally have all the pieces we need to verify that the composable workflow works. Let's run it!
Here you see the advantage of using the main.nf naming convention.
If we had named the entrypoint workflow something_else.nf, we would have had to do nextflow run original-hello/something_else.nf.
If you made all the changes correctly, this should run to completion.
Output
N E X T F L O W   ~  version 25.04.3

Launching `original-hello/main.nf` [friendly_wright] DSL2 - revision: 1ecd2d9c0a

executor >  local (8)
[24/c6c0d8] HELLO:sayHello (3)       | 3 of 3 ✔
[dc/721042] HELLO:convertToUpper (3) | 3 of 3 ✔
[48/5ab2df] HELLO:collectGreetings   | 1 of 1 ✔
[e3/693b7e] HELLO:cowpy              | 1 of 1 ✔
Output: /workspaces/training/hello-nf-core/work/e3/693b7e48dc119d0c54543e0634c2e7/cowpy-COLLECTED-test-batch-output.txt
This means we've successfully upgraded our HELLO workflow to be composable.
Takeaway
You know how to make a workflow composable by giving it a name and adding take, main and emit statements, and how to call it from an entrypoint workflow.
What's next?
Learn how to graft a basic composable workflow onto the nf-core scaffold.
3. Fit the updated workflow logic into the placeholder workflow
Now that we've verified our composable workflow works correctly, let's return to the nf-core pipeline scaffold we created in section 1. We want to integrate the composable workflow we just developed into the nf-core template structure, so the end result should look something like this.
So how do we make that happen? Let's have a look at the current content of the HELLO workflow in core-hello/workflows/hello.nf (the nf-core scaffold).
Overall this code does very little aside from some housekeeping that has to do with capturing the version of any software tools that get run in the pipeline.
We need to add the relevant code from the composable version of the original workflow that we developed in section 2.
We're going to tackle this in the following stages:
- Copy over the modules and set up module imports
- Leave the
takedeclaration as is - Add the workflow logic to the
mainblock - Update the
emitblock
Note
We're going to ignore the version capture for this first pass and will look at how to wire that up in a later part of this training.
3.1. Copy the modules and set up module imports
The four processes from our Hello Nextflow workflow are stored as modules in original-hello/modules/.
We need to copy those modules into the nf-core project structure (under core-hello/modules/local/) and add import statements to the nf-core workflow file.
First let's copy the module files from original-hello/ to core-hello/:
You should now see the directory of modules listed under core-hello/.
Directory contents
Now let's set up the module import statements.
These were the import statements in the original-hello/hello.nf workflow:
| original-hello/hello.nf | |
|---|---|
Open the core-hello/workflows/hello.nf file and transpose those import statements into it as shown below.
Two more interesting observations here:
- We've adapted the formatting of the import statements to follow the nf-core style convention.
- We've updated the relative paths to the modules to reflect that they're now stored at a different level of nesting.
3.2. Leave the take declaration as is
The nf-core project has a lot of prebuilt functionality around the concept of the samplesheet, which is typically a CSV file containing columnar data.
Since that is essentially what our greetings.csv file is, we'll keep the current take declaration as is, and simply update the name of the input channel in the next step.
| core-hello/workflows/hello.nf | |
|---|---|
The input handling will be done upstream of this workflow (not in this code file).
3.3. Add the workflow logic to the main block
Now that our modules are available to the workflow, we can plug the workflow logic into the main block.
As a reminder, this is the relevant code in the original workflow, which didn't change much when we made it composable (we just added the main: line):
We need to copy the code that comes after main: into the new version of the workflow.
There is already some code in there that has to do with capturing the versions of the tools that get run by the workflow. We're going to leave that alone for now (we'll deal with the tool versions later).
We'll keep the ch_versions = channel.empty() initialization at the top, then insert our workflow logic, keeping the version collation code at the end.
This ordering makes sense because in a real pipeline, the processes would emit version information that would be added to the ch_versions channel as the workflow runs.
You'll notice that we also added a blank line before main: to make the code more readable.
This looks great, but we still need to update the name of the channel we're passing to the sayHello() process from greeting_ch to ch_samplesheet as shown below, to match what is written under the take: keyword.
Now the workflow logic is correctly wired up.
3.4. Update the emit block
Finally, we need to update the emit block to include the declaration of the workflow's final outputs.
This concludes the modifications we need to make to the HELLO workflow itself. At this point, we have achieved the overall code structure we set out to implement.
Takeaway
You know how to fit the core pieces of a composable workflow into an nf-core placeholder workflow.
What's next?
Learn how to adapt how the inputs are handled in the nf-core pipeline scaffold.
4. Adapt the input handling
Now that we've successfully integrated our workflow logic into the nf-core scaffold, we need to address one more critical piece: ensuring that our input data is processed correctly.
The nf-core template comes with sophisticated input handling designed for complex genomics datasets, so we need to adapt it to work with our simpler greetings.csv file.
4.1. Identify where inputs are handled
The first step is to figure out where the input handling is done.
You may recall that when we rewrote the Hello Nextflow workflow to be composable, we moved the input parameter declaration up one level, in the main.nf entrypoint workflow.
So let's have a look at the top level main.nf entrypoint workflow that was created as part of the pipeline scaffold:
The nf-core project makes heavy use of nested subworkflows, so this bit can be a little confusing on first approach.
What matters here is that there are two workflows defined:
CORE_HELLOis a thin wrapper for running the HELLO workflow we just finished adapting incore-hello/workflows/hello.nf.- An unnamed workflow that calls
CORE_HELLOas well as two other subworkflows,PIPELINE_INITIALISATIONandPIPELINE_COMPLETION.
Importantly, we cannot find any code constructing an input channel at this level, only references to a samplesheet provided via the --input parameter.
A bit of poking around reveals that the input handling is done by the PIPELINE_INITIALISATION subworkflow, appropriately enough.
If we open up core-hello/subworkflows/local/utils_nfcore_hello_pipeline/main.nf and scroll down, we come to this chunk of code:
This is the channel factory that parses the samplesheet and passes it on in a form that is ready to be consumed by the HELLO workflow.
Note
The syntax above is a little different from what we've used previously, but basically this:
is equivalent to this:
This code involves some parsing and validation steps that are highly specific to the example samplesheet included with the nf-core pipeline template, which at time of writing is very domain-specific and not suitable for our simple pipeline project.
4.2. Replace the templated input channel code
The good news is that our pipeline's needs are much simpler, so we can replace all of that by the channel construction code we developed in the original Hello Nextflow workflow.
As a reminder, this is what the channel construction looked like (as seen in the solutions directory):
| solutions/composable-hello/main.nf | |
|---|---|
So we just need to plug that into the initialisation workflow, with minor changes: we update the channel name from greeting_ch to ch_samplesheet, and the parameter name from params.greeting to params.input (see highlighted line).
| core-hello/subworkflows/local/utils_nfcore_hello_pipeline/main.nf | |
|---|---|
That completes the changes we need to make the input processing work.
In its current form, this won't let us take advantage of nf-core's built-in capabilities for schema validation, but we can add that in later. For now, we're focused on keeping it as simple as possible to get to something we can run successfully on test data.
4.3. Update the test profile
Speaking of test data and parameters, let's update the test profile for this pipeline to use the greetings.csv mini-samplesheet instead of the example samplesheet provided in the template.
Under core-hello/conf, we find two templated test profiles: test.config and test_full.config, which are meant to test a small data sample and a full-size one.
Given the purpose of our pipeline, there's not really a point to setting up a full-size test profile, so feel free to ignore or delete test_full.config.
We're going to focus on setting up test.config to run on our greetings.csv file with a few default parameters.
4.3.1. Copy over the greetings.csv file
First we need to copy the greetings.csv file to an appropriate place in our pipeline project.
Typically small test files are stored in the assets directory, so let's copy the file over from our working directory.
Now the greetings.csv file is ready to be used as test input.
4.3.2. Update the test.config file
Now we can update the test.config file as follows:
Key points:
- Using
${projectDir}: This is a Nextflow implicit variable that points to the directory where the main workflow script is located (the pipeline root). Using it ensures the path works regardless of where the pipeline is run from. - Absolute paths: By using
${projectDir}, we create an absolute path, which is important for test data that ships with the pipeline. - Test data location: nf-core pipelines typically store test data in the
assets/directory within the pipeline repository for small test files, or reference external test datasets for larger files.
And while we're at it, let's tighten the default resource limits to ensure this will run on very basic machines (like the minimal VMs in Github Codespaces):
This completes the code modifications we need to do.
4.4. Run the pipeline with the test profile
That was a lot, but we can finally try running the pipeline!
Note that we have to add --validate_params false to the command line because we didn't set up the validation yet (that will come later).
If you've done all of the modifications correctly, it should run to completion.
Output
N E X T F L O W ~ version 25.04.3
Launching `core-hello/main.nf` [condescending_allen] DSL2 - revision: b9e9b3b8de
Input/output options
input : /workspaces/training/hello-nf-core/core-hello/assets/greetings.csv
outdir : core-hello-results
Institutional config options
config_profile_name : Test profile
config_profile_description: Minimal test dataset to check pipeline function
Generic options
validate_params : false
trace_report_suffix : 2025-11-21_07-29-37
Core Nextflow options
runName : condescending_allen
containerEngine : docker
launchDir : /workspaces/training/hello-nf-core
workDir : /workspaces/training/hello-nf-core/work
projectDir : /workspaces/training/hello-nf-core/core-hello
userName : root
profile : test,docker
configFiles : /workspaces/training/hello-nf-core/core-hello/nextflow.config
!! Only displaying parameters that differ from the pipeline defaults !!
------------------------------------------------------
executor > local (1)
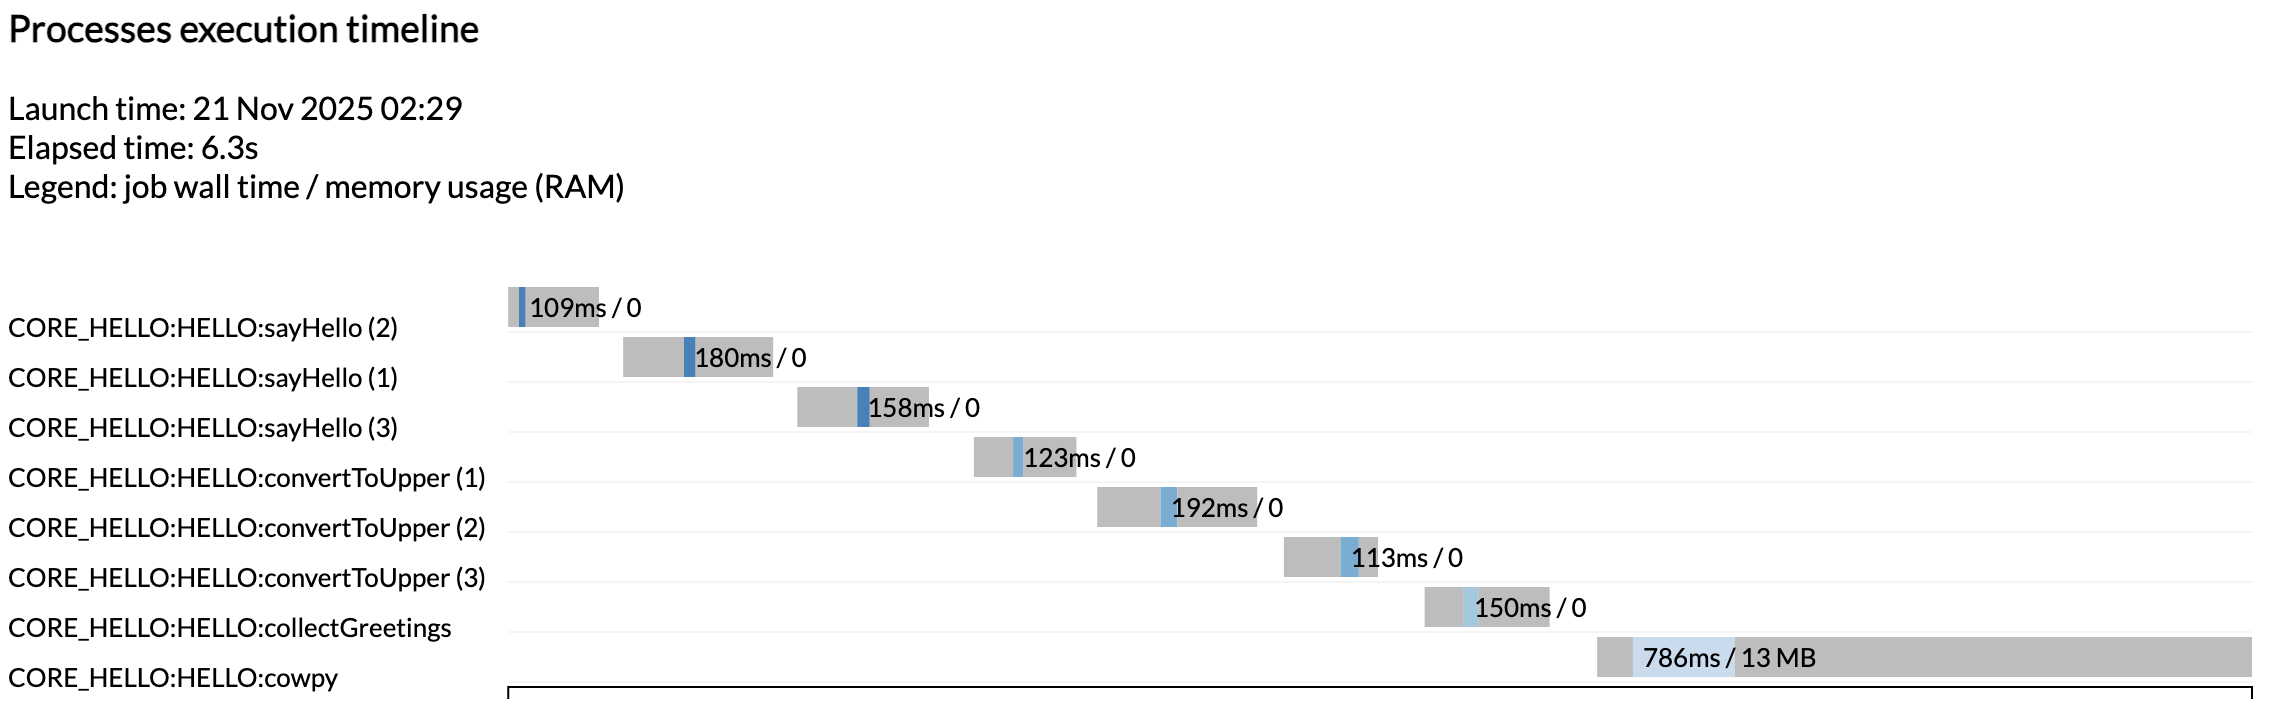
[ed/727b7e] CORE_HELLO:HELLO:sayHello (3) [100%] 3 of 3 ✔
[45/bb6096] CORE_HELLO:HELLO:convertToUpper (3) [100%] 3 of 3 ✔
[81/7e2e34] CORE_HELLO:HELLO:collectGreetings [100%] 1 of 1 ✔
[96/9442a1] CORE_HELLO:HELLO:cowpy [100%] 1 of 1 ✔
-[core/hello] Pipeline completed successfully-
As you can see, this produced the typical nf-core summary at the start thanks to the initialisation subworkflow, and the lines for each module now show the full PIPELINE:WORKFLOW:module names.
4.5. Find the pipeline outputs
The question now is: where are the outputs of the pipeline? And the answer is quite interesting: there are now two different places to look for the results.
As you may recall from earlier, our first run of the newly created workflow produced a directory called core-hello-results/ that contained various execution reports and metadata.
Directory contents
core-hello-results
└── pipeline_info
    ├── execution_report_2025-11-21_04-47-18.html
    ├── execution_report_2025-11-21_07-29-37.html
    ├── execution_timeline_2025-11-21_04-47-18.html
    ├── execution_timeline_2025-11-21_07-29-37.html
    ├── execution_trace_2025-11-21_04-47-18.txt
    ├── execution_trace_2025-11-21_07-29-37.txt
    ├── hello_software_versions.yml
    ├── params_2025-11-21_04-47-13.json
    ├── params_2025-11-21_07-29-41.json
    └── pipeline_dag_2025-11-21_04-47-18.html
    └── pipeline_dag_2025-11-21_07-29-37.html
You see we got another set of execution reports in addition to the ones we got from the first run, when the workflow was still just a placeholder. This time you see all the tasks that were run as expected.
Note
Once again the tasks were not run in parallel because we are running on a minimalist machine in Github Codespaces. To see these run in parallel, try increasing the CPU allocation of your codespace and the resource limits in the test configuration.
That's great, but our actual pipeline results are not there!
Here's what happened: we didn't change anything to the modules themselves, so the outputs handled by module-level publishDir directives are still going to a results directory as specified in the original pipeline.
Directory contents
Ah, there they are, mixed in with the outputs of earlier runs of the original Hello pipeline.
If we want them to be neatly organized like the outputs of the demo pipeline were, we'll need to change how we set up the outputs to be published. We'll show you how to do that later in this training course.
And there it is! It may seem like a lot of work to accomplish the same result as the original pipeline, but you do get all those lovely reports generated automatically, and you now have a solid foundation for taking advantage of additional features of nf-core, including input validation and some neat metadata handling capabilities that we'll cover in a later section.
Takeaway
You know how to convert a regular Nextflow pipeline into an nf-core style pipeline using the nf-core template. As part of that, you learned how to make a workflow composable, and how to identify the elements of the nf-core template that most commonly need to be adapted when developing a custom nf-core style pipeline.
What's next?
Take a break, that was hard work! When you're ready, move on to Part 3: Use an nf-core module to learn how to leverage community-maintained modules from the nf-core/modules repository.